If you do not remember your username or password, the system can send them to you. Please provide the email address you registered with.
Error: Please check your email address and try again.
The event you requested is not currently published.
Thank you to our premier national sponsors
Thank you to our local sponsors
Title Sponsor
Diamond Sponsors
Platinum Sponsors
Gold Sponsors
Silver Sponsors
- • Aztec Events & Tents
- • CenterPoint Energy
- • Donato, Minx, Brown & Pool, P.C.
- • Marathon Oil
Media Sponsors
Being safe and prepared is a priority.
Safety
The safety of our cyclists is the number one priority at the . Each year, thousands of participants make their way from Houston to Austin. There is a great mix of riders with different experience and skill levels on the road together. To help ensure that everyone has a great ride and arrives safely at the finish line, we work hard to create a proactive approach to safety.
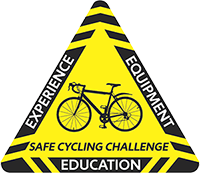
Safety isn't just about wearing your helmet and knowing the rules of the road. Those are very important measures, but cycling safety encompasses a wide variety of topics including bike maintenance, group riding skills, cycling etiquette, and much more. To be best prepared for the event, participants should be familiar with the three E’s of cycling safety: Experience (Training), Education, and Equipment.
The National MS Society strongly encourages you to review the compiled bike safety information resources below. This information will help you prepare and practice safe cycling skills.
Ride safely and have fun because there's nothing like crossing the finish line and celebrating with your team! Don't just ride, Bike MS.
Group Riding Skills
The Group Riding Skills Course is conducted by the League of American Bicyclists. The LAB is the Society's education partner and a national organization dedicated to cycling, cycling advocacy and cycling education.
Group Riding Skills CourseLAB
Education has been a core activity of the League's since the late 1970's. It is designed to work with experience levels ranging from brand-new bicyclists up to experienced bicyclists who want to refine their skills and teach others.
League of American BicyclistsSafe Cycling Challenge
The online Safe Cycling Challenge is intended for educational purposes only. It is not a pass/fail test so feel free to take it as many times as you'd like. The questions have been designed to increase your knowledge and awareness of a broad range of cycling safety practices that you are likely to experience during training rides and the BP MS 150 event itself.
Safety Tips
Ride Predictably Communicate (pdf)
Riding in a Group (pdf)
Additional Safety Resources
Click each heading below to expand/collapse that section or download the associated document.
- Obey law enforcement personnel, ride officials, volunteers, residents, and vehicle drivers.
- Don’t litter.
- Obey all state and local traffic laws.
- Support the local communities.
- Respect private property.
- Use restroom facilities only.
- Curb inappropriate language and profanity.
All states consider cyclists vehicle operators, and give them the same rights and duties as other drivers.
- Know and obey all traffic laws: The golden rule of bicycling in a group is "Be Predictable"!
- Stay to the right: Ride in the right portion of the rightmost lane in the direction you are traveling, and leave at least four feet between your handlebars and parked cars or other hazards (including other cyclists). You may move to the left when passing slower vehicles or preparing for a left turn.
- Obey all traffic signs and signals: Avoid "following the leader" through traffic signs and signals. You are required to obey all traffic signs and signals, including stopping at red lights and stop signs.
- Look and signal before you move: Always scan behind you before changing lanes or making turns. A continuous arm signal is required prior to a turn or lane change (unless arm is needed to control the bike) and while stopped waiting to turn.
- Two-at-a-time: Ride no more than two abreast and do not impede traffic. If a part of the road has been closed and dedicated to "bicycle traffic only", you may ride more than two abreast.
- Hands on the handlebars: Do not carry anything that prevents keeping both hands on the handlebars.
- Pass with care: Do not pass at intersections.
For Youth Riders: Cycling for Minors 101 Brochure (pdf)
NHTSA Bicycle Safety Tips Video:
Training for an Endurance Ride
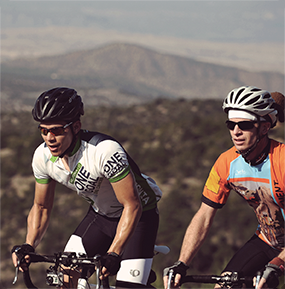
The is more than just a ride; it's also the anticipation and preparation for an incredible experience. Training is a journey in itself and is essential to a successful ride. Training will help you to prepare mentally and physically.
Recommended Rides
It's all about your safety and success. Join one of the Recommended Rides in and around the Houston & Austin area to practice group cycling and train for the BP MS 150. Fees vary per ride.
Recommended Rides16 Week Training Guide
To assist you with your preparations, USA Cycling Coach and BP MS 150 Safety Committee Member Alan Bazard has provided the 16 week training guide.
16 Week Training Guide (PDF) 16 Week Training Guide (XLS)
Training Peaks
We're pleased to introduce you to TrainingPeaks, the official training software of Bike MS! We are excited about this partnership and invite you to experience it.
Training PeaksIf you prefer a downloadable and printable training guide, we have that too!
Additional Training Resources:
Click each heading below to expand/collapse that section or download the associated document.
Education
The appropriate cycling equipment and cycling education are two major components to ensure you’ll have an enjoyable BP MS 150 experience. Another vital part of preparing for the experience—and one you definitely don’t want to discount or neglect—is ensuring your body, the engine that’s going to power you from Houston to Austin, is fueled up and ready to go by practicing proper nutrition and hydration.
IRONMAN Sports Medicine Institute • Memorial Hermann – Official Healthcare Partner of the BP MS 150
Nutrition Tips for the BP MS 150
Here are six quick tips to keep you well-fueled between Houston and Austin, provided by the IRONMAN Sports Medicine Institute.
Nutrition for Cyclists: Three Guidelines – Eating right for long distance bicycle rides isn’t as difficult as you might think. Pay attention to just three fairly simple nutritional guidelines, and your body should be ready to perform its best come race day.
Nutritional guidelines for distance cyclists fall into three categories:
- Hydration
- Plate organization
- Recovery
Water vs. Sports Drinks – Hydration can come either in the form of water or sports drink. Both options play important roles and many athletes drink a combination of both throughout the duration of their exercise. Water makes up a large percentage of muscle tissue, keeps you cool, and aids digestion among many other important functions. Sports drinks often consist of a combination of water, carbohydrates, and electrolytes providing an efficient form of fluid and fuel.
Eat Like a Cyclist
Be smart about food to consolidate your gains on the bike. Here's how.
written by Selene Yeager with Leslie Bonci, MPH, RD, courtesy of Bicycling Magazine
So you want to get fit and fast, and feel great? The riding is the key to reaching that goal, but your eating habits might need to change, too. Accounting for the food you take in is the necessary first step. Too often people want to overhaul their eating but don't have a clue about what they are currently doing. They don't think about how many times a day they eat, or where, or how fast they plow through lunch, and so on. The answer: Write down what you consume.
Now Recording
Several kinds of food journals are available; you can find them online and in the book we're excerpting here. Keep a log daily if possible, to identify patterns then pick the areas you want to work on.
The more detail you provide, the more you'll get out of this. Just writing "sandwich" is not nearly as revealing as "turkey and cheese on whole wheat with lettuce and tomato" or "meatball hero." And that goes for amounts, too. A glass could be a vat, and a handful could be a small jar. Use measuring cups and spoons. Often when people try to lose weight,portion control is the biggest barrier. After three days, use the log to adjust your eating habits going into the following week.
Time of Day
Are your calories spread evenly through the day? If so, good. If not, it's probably true that like many people, you're eating most of your food at night. Think about how you can redistribute those calories for energy all day long, starting with your morning meal.
Where
Location is more of a factor than you might think. If you always eat in front of your computer and find yourself snacking soon after your meal, that's a flag that you're not registering that you just ate because you're distracted. Eating should be an event in and of itself.
Rate
Winning the award for grab, gulp, and go? The "prize" is generally excess pounds. If it takes you less than 20 minutes to finish a meal, work on slowing down to prevent overeating.
How Much
Your plate should be filled with reasonable portions. Three ounces of meat is about the size of a deck of cards. Grains, potatoes, pasta, and rice should be about the size of one tightly balled fist. The correct portions are probably a little smaller than you think they should be because we, as a society, have been supersizing for more than a decade. Start cutting down to the right sizes. You won't miss the excess.
How and When to Hydrate
Everything you need to know to stay hydrated-before, during and after a ride.
written by Marianne McGinnie, courtesy of Bicycling Magazine
Sipping fluids before and after a hot-weather workout is just as important as drinking during a ride. Here we turn to the experts for the when, how and what of staying quenched.
Time It Right
Hydrating before pedaling helps you avoid drying out on the road. For best absorption, sip 12 to 16 ounces of water four hours before hopping onto your bike; two hours before, sip another 12 ounces. While riding, drink enough to match the intensity of the exercise, the heat of the day and your body's needs-the average recommendation is one 16-ounce bottle per hour in cool weather, up to as many as four bottles per hour in extremely hot weather, based on a 150-pound cyclist. Afterward, your goal is to replace lost fluids and electrolytes. If the ride was easy or moderate, sipping water and having a small meal within an hour of finishing should be sufficient, but if the ride was long and intense, use the weighing method below to determine your drinking regimen.
Customize
People sweat at different rates, and rides vary in terrain, speed and distance, but hydration goals are the same regardless. "Your aim is to minimize fluid and electrolyte loss or gain," says Douglas Casa, Ph.D., the director of athletic training education at the University of Connecticut, at Storrs. The best way to learn your individual sweat rate: Step on the scale before and after a long or hard ride. If you weigh less afterward, you should be drinking a bit more; if you weigh more, you should cut back to avoid overhydration.
Keep It Simple
"On easier rides, stick with water. You'll get the mother lode of electrolytes, calories and fluids from the meals and fluids you consume prior to, and after, your ride," says Casa, who's been researching hydration and exercise issues for more than a decade. When a ride is intense, pushes past an hour, or is in hot weather, consider a sports drink. "I recommend staying away from the stuff with 9,000 ingredients," says Casa. "You just need the essentials-fluid, carbohydrates and electrolytes."
Try and Try Again
The only way to find what drinks work for you is by testing them. "Some products may not taste good to you, while others may sit in your stomach in a bad way," says Casa. If you're the type of salty sweater who finds white streaks on your jersey after a ride, you may need a drink with more sodium. For extreme salt sweaters, Casa suggests adding 1/4 teaspoon of salt to 16 ounces of sports drink (that's 600mg of sodium). If you find that a sports drink upsets your stomach, try diluting it with water. "Just never start a big event with a new product in your bottle," says Casa. "That's a recipe for disaster."
Cycling Tips
Cyclists need to have basic bike-handling skills and safety knowledge in order to keep themselves and others around them safe, especially while participating in group cycling activities, like a bike ride. Our focus is to provide a high quality, safe and fun bicycling experience. For this reason, the National MS Society has partnered with the League of American Bicyclists to provide our cyclists with the knowledge and resources to cycle safety.
Table of Contents:
- Tips for Riding in Wet Conditions
- Helpful Tips
- Know the Lingo
- Special Situations
- The Basics of Riding in a Group
Tips for Riding in Wet Conditions
Cornering
- Make turns slowly and consistently (no jerky movements)
- Keep your weight on the outside pedal in the 6 o'clock position
- If you need to brake in a turn, apply the brakes slowly
Braking
- Remember: Water on the rims will lubricate your brake system, making it hard to stop
- Apply the brakes lightly to clean off the rims before you need to stop
- Allow a greater distance for stopping
Hazards
- Bridges, metal grates, painted lines, manhole covers, and crosswalks can be very slick
- Avoid puddles; they may conceal deep potholes
- Remember that, during the first few minutes of rain, oil seeps from the roadway, making it very slick. Ride accordingly
Protect Yourself
- Visibility can be limited during a storm. Wear bright clothing
- Keep your eyes free of debris with yellow or clear lenses in your glasses
- Wear waterproof clothing that is breathable, with layers underneath
Protect Your Bike
- Front and rear fenders will keep you and your bike dry
- Lube your chain before and after a wet ride to replace the lube that washed off
- Drip chain lube down into your brake and shifter cables to avoid rust
Important reminder! Always carry the following items:
- Identification
- Emergency contact information
- Insurance card
- Any important health information
- NOTE: The use of headphones, cell phones, radios, or similar devices while riding is NOT permitted.
Helpful Tips
On the routes, our active route support team works to make the ride safe. Here are a few additional suggestions to help keep everyone safe on the ride:
- SAG vehicles and Motorcycle Marshals will stop for you if you are safely off the road, off your bike, and waving your bike helmet in the air
- Ride Marshals are a special team of cyclists who provide support on the rides, offering minor mechanical help along the route and monitoring cycling safety and etiquette
- Rest Stop Etiquette: All cyclists who enter a rest area must pull over, dismount, and move completely away from the road and rest-stop entrance; on exiting, move beyond the rest area and proceed with caution on the right side of the road before merging with faster cyclists
- Passing: Call out "Passing on your left!" and allow time for the cyclist being overtaken to move to the right, then pass safely; passing others and being passed occurs continuously during the ride, so you will hear this a lot!
- Mechanical Problems: Safely remove yourself from the roadway at the earliest opportunity and assess the problem. If assistance is needed, SAG and Motorcycle Marshals are on patrol to help; stand off your bike and wave your helmet in the air.
- Be Courteous: participants are privileged to ride on many trails as well as public roads, so we want to return the kindness by using no more than half the trail so as not to block the flow of other users
Know the Lingo
Group cycling has its own form of communication. The presence of road hazards, directions, and need-to-know information is relayed through the pack of riders by gestures and words. Remember to pass all communication on to the cyclist behind you in the group. Speak loudly and clearly. The following are the most common terms you may hear in group-sponsored rides:
- "On your left" – This means a rider is approaching your left side; move to the right (as able) to allow room for the other rider to pass
- "Car back" – This means a car is approaching from the rear. All riders make an effort to move to the right to allow the car to pass (in most states, the law requires cyclists to ride no more than two abreast, ensuring easier and safer passing of cyclists by automobile traffic)
- "Gravel"/"Pothole"/"Sand"/"Tracks" – Each of these messages is to alert the riders behind you of hazardous road conditions, relayed not only by words but also by the gesture of pointing to the hazard well in advance
- "Flat" – This indicates that a rider has suffered a flat tire and needs room enough to slow down and move to the right side of the road or trail for repair; offer assistance if needed
- "Slowing" – The cyclist in front of you is slowing down, so use caution and prepare to stop (the common hand signal for this is to display the palm of their hand toward riders behind them to indicate slowing and stopping)
- "Stopping" – This indicates that a rider ahead is stopping; when at a stop, do not forget to unclip from your pedals
Group communication between teams and between individual riders is vitally important to ensuring the safety of all riders. Therefore, headphones, cell phones, radios, or similar devices are NOT permitted while riding.
Special Situations
Many cyclists find that situations occur in which quick thinking and heightened bike-handling skills are required. Here are some suggestions for managing potential obstacles:
- Cars Can Be Scary: Drivers do not know your skill level, and will often not leave room when they pass; call out "car back" if you are in a group at the time, then move to the far right in a single file—"Be Predictable"
- Beware of Animals: If an animal displays aggression while riding, try to keep to one side of the animal; the right course of action depends on the situation – you may want to slow down to calm an excited animal, speed up to outrun the animal, make loud noises to perturb the animal, or attempt to distract it with a water bottle or other material on your person; if in a group, always let others know of your intentions and do not perform any action which may endanger the group
- Pedestrians and Animals Have the Right-of-Way: If a jogger/runner is overtaking you and/or your group, or if any pedestrian or animal is attempting to cross the street ahead of you, signal to the group that someone is being overtaken, then move to allow room for safe passing/crossing
- How To Ride in the Rain (pdf), presented by Bicycling Magazine
The Basics of Riding in a Group
Group riding takes practice. Riding with other cyclists all around you may cause you to feel trapped. Relax. It is most important to create your own safety zone. This may vary depending on the speed and ability level of the people you are with, so be flexible. Let others know of your anxiety – they may also be new at this.
Your responsibility in a pack includes:
- Be aware of others around you
- Communicate well in advance; use gestures in combination with verbal commands
- Ride with your head up; look down the road—not at the person in front of you
- Maintain control and speed of your bike, even going downhill
- Know your limits! – crashes can occur when inexperienced riders do not have bike-handling skills to make quick decisions in a pack
- Safety starts with you; group mentality is not always safe
- Expect to stop at all red lights and stop signs—it is the law!—each cyclist is responsible for verifying that the intersection is clear
- Adjust your safety zone to fit the conditions of the road, weather, and traffic; always plan an escape route
- Never overlap your wheels with another cyclist
- Do not use aerobars in a group
- Be aware of how weather will affect your bike; riding in wet conditions requires slower speeds and greater breaking distances
- Be respectful of other riders; help others when needed
- Join The Pack Safely, presented by Bicycling Magazine.
Equipment
All participants are responsible for keeping their riding equipment in good working order. If you have questions or concerns, visit a local Official Bike Store to talk to store personnel that have experience with the BP MS 150 and can help you get the equipment you need to have a great ride.
Bike Safety Inspection, provided by our Official Bike Stores
ABC Quick Check
Always check your bicycle before starting out to avoid unpleasant surprises during your ride. The term "ABC Quick Check" will help you remember what to do:
A is for Air
- Inflate tires to the pressure listed on the side of the tire
- Use a pressure gauge to ensure proper pressure
- Check for damage on tire and replaced if damaged
B is for Brakes
- Inspect pads for wear; replace if there is less than one-quarter inch of pad left
- Check cable tightness, frayed cables and alignment of the pads with the rims
C is for Cranks, Chain, and Cassette
- Check you pedals and cranks for tightness
- Check chain for looseness and bad links
- Check derailleur for worn cogs and adjustment
- Check that your gears change smoothly
Q is for Quick Release
- Make sure all of your quick releases on your wheels are closed
Check
- Check you helmet for cracks and make sure it fits properly
- Check your shoes for tight cleats and straps and buckles are in good repair
- Make sure you saddle (seat) is at the right height and the bolt is tight
Helmet Smart
Head injuries are a special concern for cyclists. Even falling at a slow rate of speed can cause a serious head injury. Helmet must be on your head and strapped securely while riding in the BP MS 150 – no exceptions.
Participants found not wearing their helmets will be disqualified from the ride and removed from the route.
- Select a certified Helmet (ASTM or Snell)
- Proper size for your head
- Helmet sits level on your head when tight
- 1-2 fingers between eyebrows and helmet
- Straps are not covering ears (plastic part below your ears)
- Chin strap snug under chin (one finger space under your chin)
- Replace helmet if involved in an accident or older than 3 years
Additional Equipment Resources
Click each heading below to expand/collapse that section or download the associated document.
Check these things after each ride, and next time you'll roll without a hitch!
written by Natasha Grief, courtesy of Bicycling Magazine
Most cyclists, if they check their bikes at all, wait to do it five minutes before the group is about to start rolling. What's the point? No one's going to wait for you to remedy a cracked frame or a torn sidewall. Be one of the smart ones: Give your bike this once-over after each ride, so you're ready to go at the drop of a hat... or helmet.
Quick-Release –
Check for: Side-to-side play in the wheel; QRs or skewers that aren't tight or secure
How? Make sure quick-releases are closed all the way and that bolt-on skewers are securely fastened.
On your next ride: Your wheel won't come loose and detach from your bike mid-ride.
Wheels –
Check for: Trueness
How? While spinning the wheel, watch the distance between the rim and the brake pad. It should be uniform for the entire rotation. If it wobbles, the wheel needs truing. (Watch our pro true a wheel at our maintenance feature at Bicycling.com)
On your next ride: Your wobbly wheel won't lead to more serious problems, such as a shudder while descending or brake pads rubbing.
Brakes –
Check for: Grit on the pads; caliper alignment
How? If your brakes feel gritty, clean the pads with a rag and degreaser; replace pads if the grooves are worn more than 50% compared to new pads. Calipers are aligned if the pads are equidistant from the rim.
On your next ride: You won't go to grab the levers only to roll right through the stop sign at the bottom of the hill.
Tires –
Check for: Low tire pressure; embedded debris in the tire; slices in the tire or sidewall
How? Inflate tires to proper pressure, and carefully remove embedded debris with tweezers. A cut tire or sidewall is prone to a blowout and shouldn't be ridden; replace it.
On your next ride: Your chances of flatting will greatly decrease, and you may have prevented a nasty mid-ride blowout.
Seat Bag –
Check for: Supplies you may have depleted on your ride
How? If you used something during a ride, replace it so it's there for the next ride. If your spare tube has been in there for a while, give it a quick inspection to make sure it's still intact.
On your next ride: You'll have a spare tube and CO2 cartridge to lend to the guy who didn't follow this post-ride checklist.
Cleats –
Check for: Loose bolts; overall wear
How? Worn-out cleats won't engage as crisply. You'll know when they've just plain quit on you; then, it's time for new cleats. Bolts can loosen over time. If your cleat isn't secure to your shoe, tighten the bolts.
On your next ride: Your foot won't pop out without warning, and you won't tumble to the ground because you couldn't disengage your cleat.
Frame –
Check for: Cracks (especially at the joints)
How? Using a rag and bike polish, wipe dirt and moisture from your frame. Look for cracks, flaking paint and other irregularities.
On your next ride: You'll either be on your bike because you didn't find a crack, or you'll be on your way to the shop for a pro evaluation. If you have a carbon-frame bike with a crack, don't mess around: Failure could be catastrophic!
Quick & Easy Bike Maintenance, an educational video brought to you from our friends at Bicycling Magazine.
Team Safety Coordinators
The Team Safety Coordinator serves an important role in assisting the Team Captain in carrying out the planning and execution of safety education, training and awareness for the team members participating in the BP MS 150. As a liaison to the National MS Society, the Team Safety Coordinator has the potential to make a significant impact through assisting with various aspects of safety education and training.
If you have any questions regarding the Team Safety Coordinator program please email the Safety Committee at bpms150safetycommittee@nmss.org.
Team Safety Coordinator Program
Team Safety Coordinator Role Description (pdf)
Team Safety Presentation - document contains information for preparing for the ride, and safety and training information for event weekend.
Safety Coordinator Presentation (pdf)
To request a member of the Safety Committee for a Team Safety Presentation, please contact bpms150safetycommittee@nmss.org.
Team Safety Coordinators - download the BP MS 150 Safety Presentation to present to your team.
Download Safety Presentation in Adobe Acrobat (pdf) format or in Microsoft PowerPoint (ppt) format
Team Safety Award Resources
2016 Team Safety Award Criteria (pdf)
2016 BP MS 150 Safety Award Application (pdf)
Team Safety Coordinator Resources
Bike MS: Safety Brochure (pdf)
Group Riding Skills Course Flyer (pdf)







Join Us
FacebookTwitterLinkedInYouTubePinterestMS Connection